 Tone Caliper
Masks: grade one part of the photo
Limit color pins to a region with a radial or linear mask, so a grade lands on the sky, a face, or one corner instead of the whole frame.
A pin grades its color everywhere that color appears in the frame. A mask adds a place to that: draw a region on the photo, and the pins you drop while it is active grade inside it only.
Add a mask
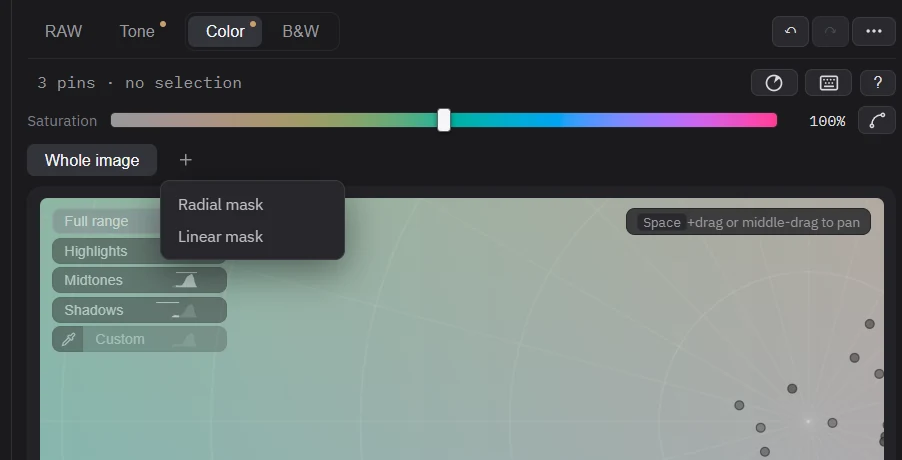
Open the Color tab. The scope bar sits between the Saturation slider and the wheel, starting with Whole image.
Click +. Choose Radial mask for an oval, or Linear mask for a graduated edge across the frame.
Grade as usual. The new mask becomes the active scope, so every pin you drop belongs to it. Click Whole image when you want the full frame back.
Shape it on the photo
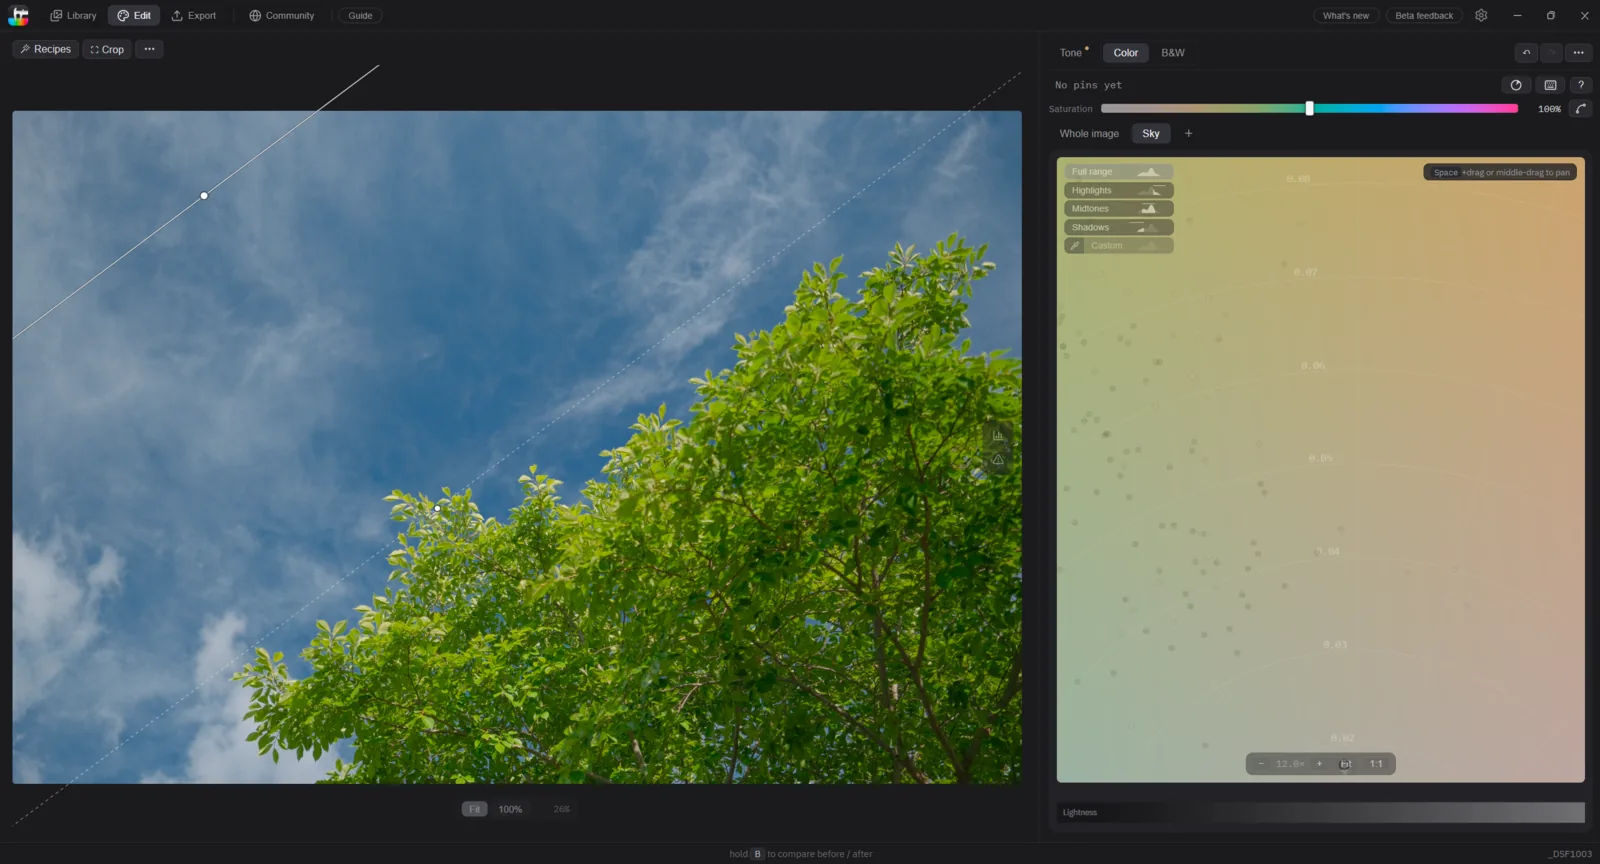
The handles stay on the photo for as long as the mask's chip is active — there is no commit step and nothing to reopen.
A radial mask has a dot at its center to move it, two dots on its edge for width and height, and a fainter dot for the feather; the width dot also rotates the oval. A linear mask has a center dot and a second dot that sets both the angle and the depth of the blend. Its solid line marks the middle of the transition, and the two dashed lines mark where the blend starts and finishes.
Hover a chip to see where its mask lives, or hold H with no pin selected — the mask reads bright against a dimmed grayscale photo, the same way a pin's catch does.
Rename, invert, and delete
Double-click a chip to rename it. Right-click a chip for the rest: Invert grades everything outside the region instead, Center mask in frame recovers a mask you have dragged past the edge of the photo, and Delete mask removes the mask together with its pins.
One photo holds up to four masks, and twelve pins shared between them.
Try this with your own photo — Tone Caliper is a free trial on Windows and macOS.
Download free trial